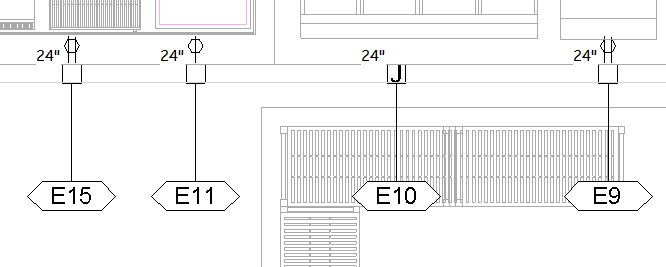
It's been a few months since our official launch and we are starting to encounter some of the same requests every few onboardings and in this article we are going to dissect one of the most popular, how to add a "E" or "P" prefix to annotation tags for electrical and plumbing rough-ins also known as installation points. I will also go over Combined Parameters to show how to create matching electrical and plumbing schedules with prefixed Item Numbers.
This article will reference the Item Number Industry Standard Parameter quite a bit, if you are not familiar with the Item Number Industry Standard Parameter then please take a look at my previous article on Calculated Parameters where I covered ISP's heavily.
The Goal
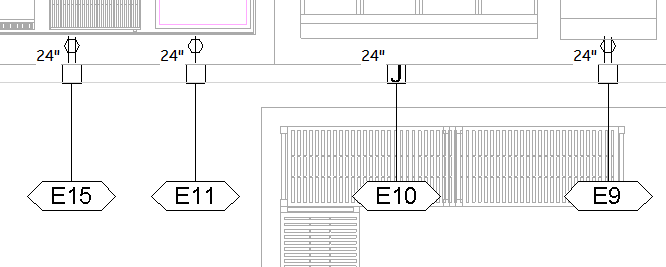
The goal is to create a tag with the Item Number of the equipment we are tagging but also has a "E" or "P" prefix, just like the tags in this image.
And like everything in Revit, there are a handful of ways you can approach this. Manually editing the Item Number in one schedule by adding an "E" or "P" to the beginning of each Item Number is one way but problematic, we must keep the Item Number intact for the other schedules to use.
How about just adding a Text block with the letter "E" in your annotation tag family? Seems promising but you lose the ability to center your text in your tag and a tag without symmetry is no friend of mine.
Step 1 - The Tag
There is actually an easy way to solve this, just add a prefix to your Label inside your annotation tag family and your center-alignment and sanity are preserved.
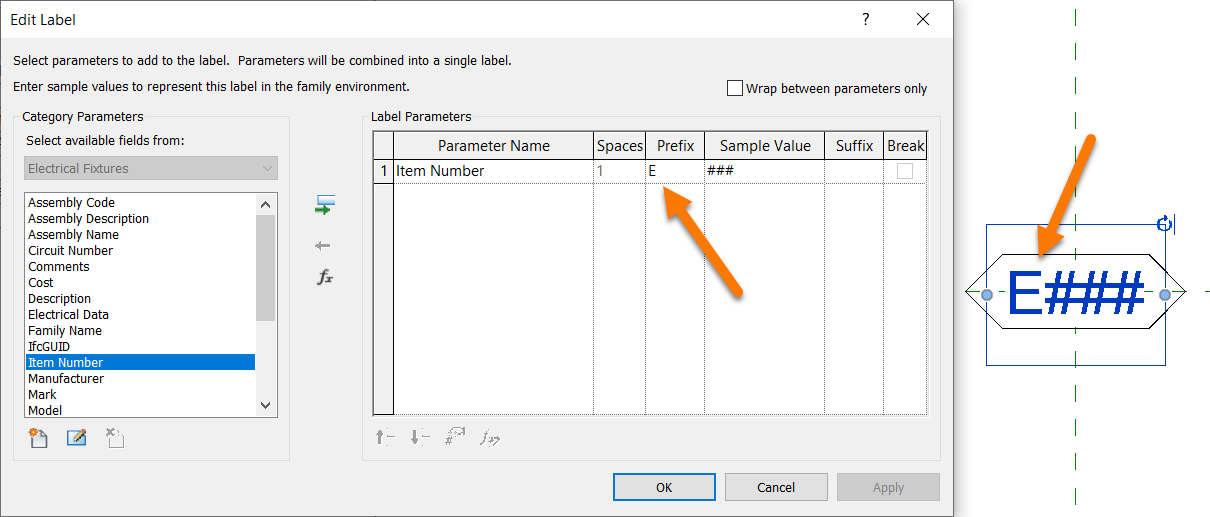
That solves the tags but what about the schedules?
Step 2 - The Schedule
We didn't actually change the Item Number parameter so the schedules are still going to show the prefix-less Item Number, but we can fix that too using Combined Parameters.
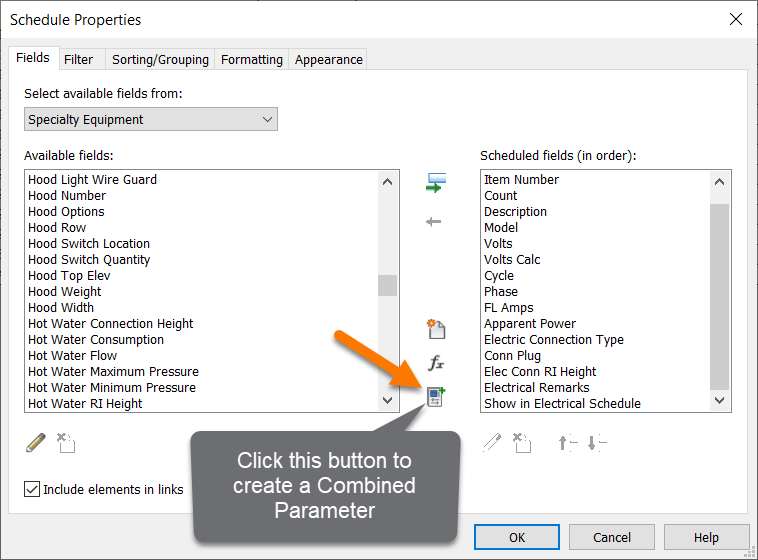
Combined Parameters are similar to Calculated Parameters in the sense that they both create a new parameter but Combined Parameters requires you start with at least 2 parameters. Combined Parameters also gives you the ability to add a prefix, just like the Label in our annotation tag.
Remember this is Revit, there are more than a few ways to slice this pie so what do we know:
- We know we need at least 2 parameters to create a Combined Parameter.
- We can create a prefix for one of those 2 parameters.
- The second parameter has to be the Item Number parameter.
To come up with our solution I like to think of our problem like this, if we weren't required to use 2 parameters, what would we do?
Well our only option would be to go the same route as our annotation tag, add a "E" prefix to the Item Number parameter. But we have to use 2 parameters...right? Technically yes but the first parameter can stay empty and just be a placeholder while the second parameter can contain the prefix and the Item Number.
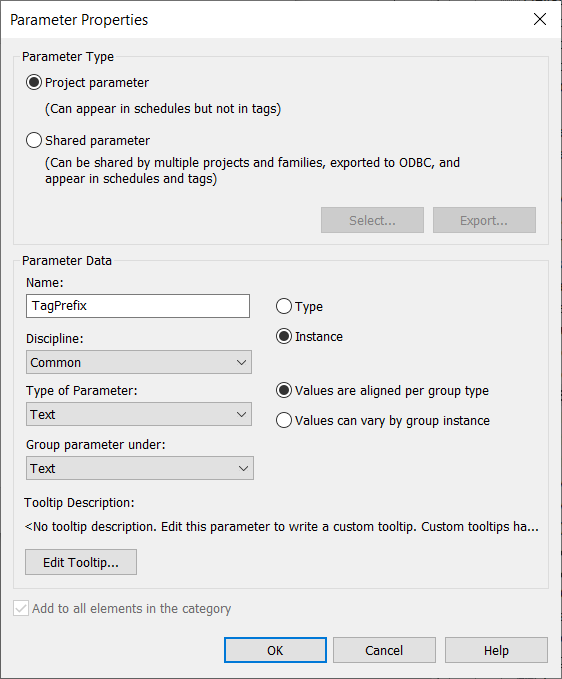
Here is where everybody gets to choose their favorite empty parameter to use as the first parameter in our Combined Parameter.
While there are plenty of choices, for this article I am just going to create a new project parameter called TagPrefix that I can guarantee to be empty, but if I was in your shoes i would probably use something like Installed By or Furnished By since I have never seen those used.
Once you have landed on your empty parameter of choice, click the Combine Parameter button and move your empty parameter and the Item Number parameter to the right. Then remove the Separators and add the "E" prefix before the Item Number parameter.
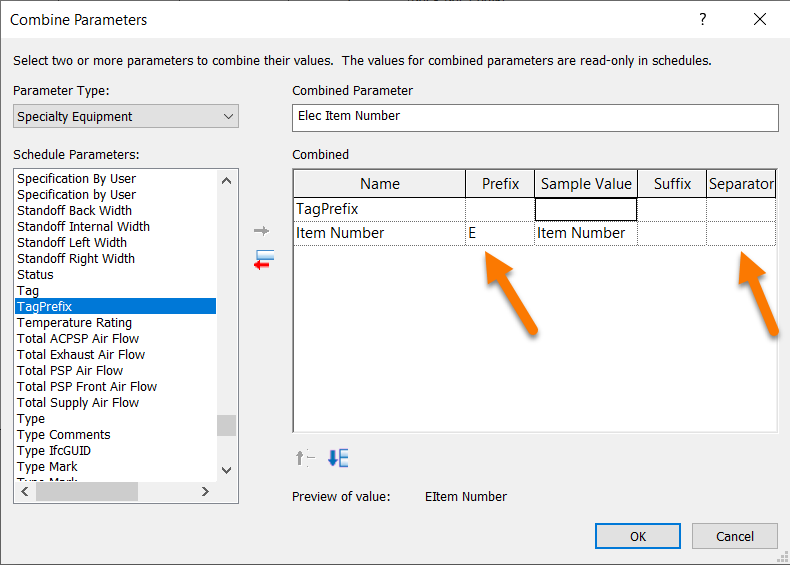
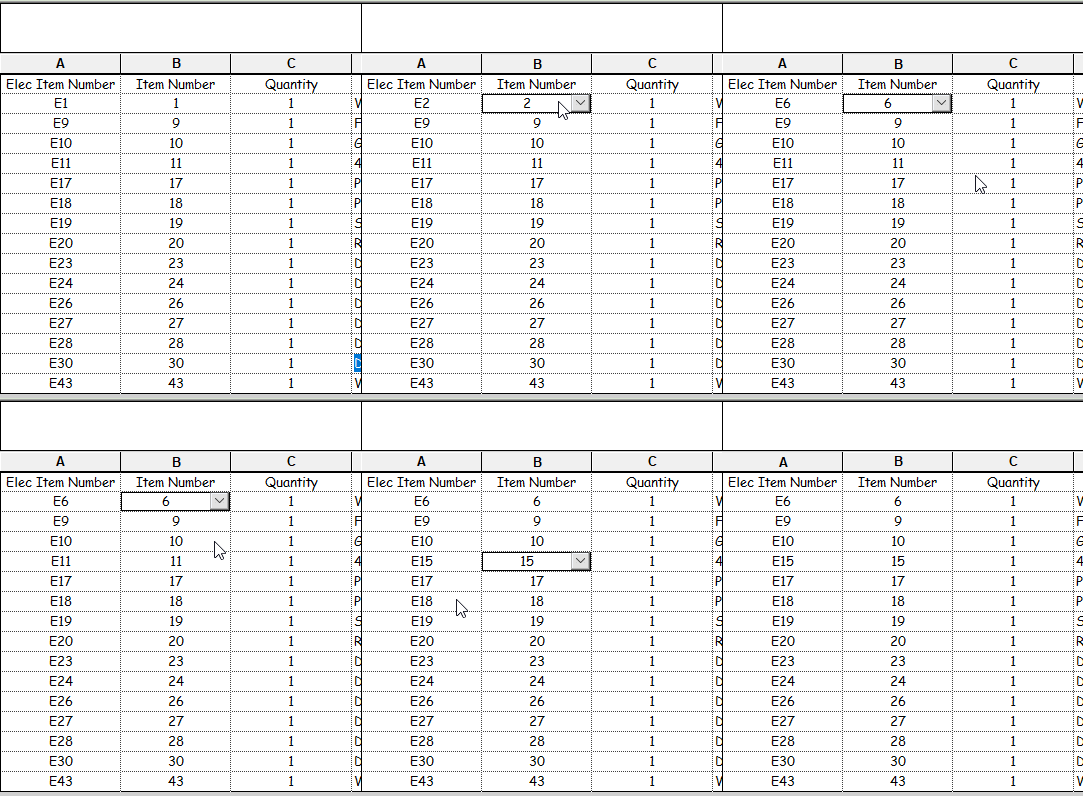
Click Ok and then return to your schedule to find your new column of fine looking prefixed Item Numbers. Oh and the best part, you never have to worry about somebody changing the Electrical Item Number, all changes must happen to the Item Number.
Now go repeat the same process for Plumbing, just change your prefix to a "P" and you can even use the same empty parameter.
Happy Designing!
Get hands-on experience with the Revit tools above with a free trial of KitchDesigner.

