

Click Here to Download the Tutorial 3 Revit Template to use with this tutorial 👈⏩💾.
Tutorial 3 – Create an Equipment Plan with Equipment Tag
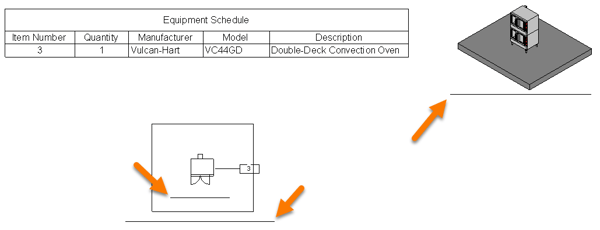
In this tutorial we will create an equipment plan with an equipment tag, a Foodservice Equipment Plan to be exact.
To begin let’s open our floor plan view, Equipment Plan. 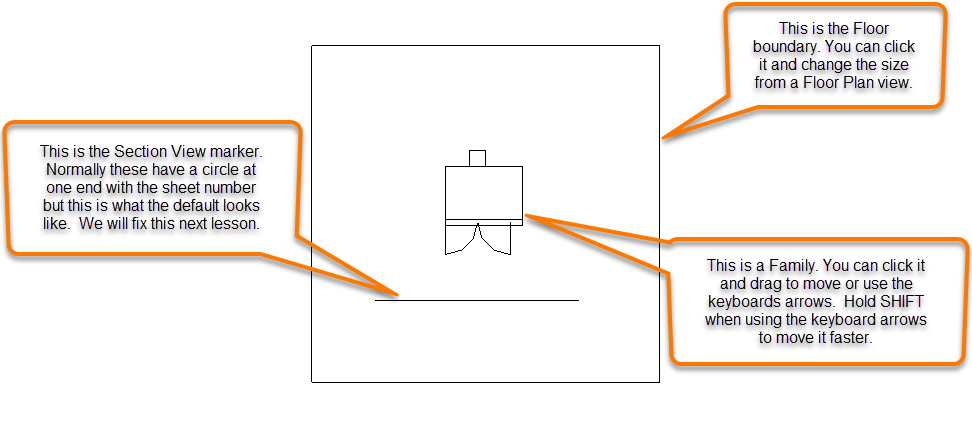
Ok so now we are ready to Tag our convection oven Family. Let’s take a look at the Annotate ribbon, specifically the Tag group. 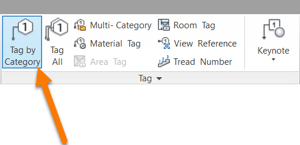 Let’s try to tag it now, click on the Tag by Category button and then click on the oven Family.
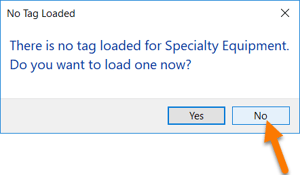 Not so fast, No Tag Loaded...
It still amazes me that Revit doesn’t ship with default Tag’s, Elevation Markers, Sections Markers…
Well we don’t anything to load so let's create one.
First click No to close this message.
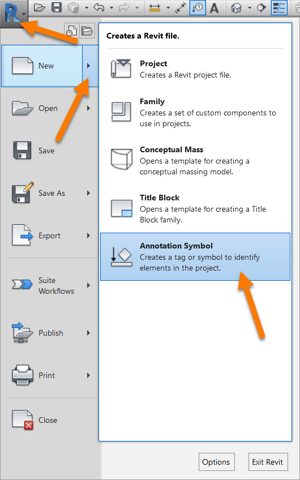
Next let’s go to the main Revit menu, then New, then click on Annotation Symbol.
Make sure you don’t click on New, click the tiny arrow or hover over it to expand it and then you will see Annotation Symbol.
A list of Family Template files (.rft) appears, not to be confused with Family files (.rfa). There are templates to create annotation families which include annotation tags and some other sheet and view markers that we will use in other tutorials. There are templates for many of the other Revit annotation tag categories but not for Specialty Equipment so we will use the Generic Annotation template and modify it.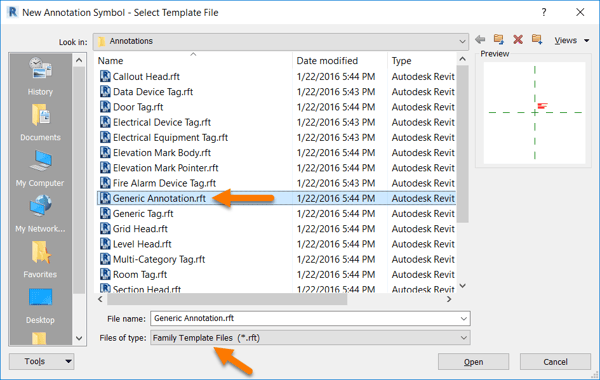
Select the Generic Annotation and click Open.
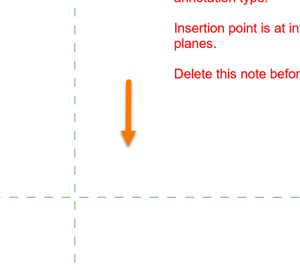
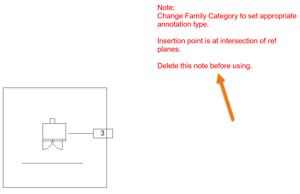
Ok so we now have the Generic Annotation template open but there isn't much here.

Revit has left us some clues though.
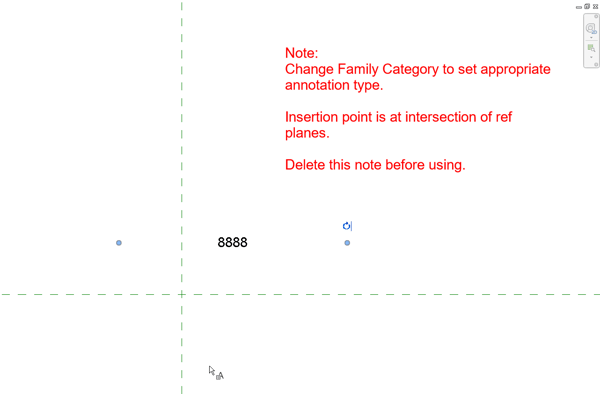
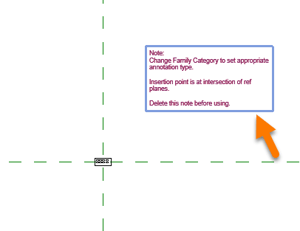
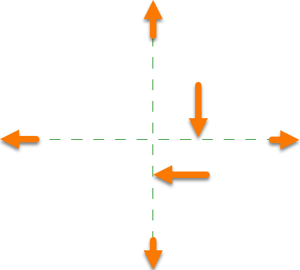 But first let’s discuss these green dashed lines. These are Reference Planes. Reference Planes are very important, they are mainly used in Family files but they can also be used in Revit project files.
They are not real lines meaning they do not show up in 3D views or show up when printed, they are only used as guides for things like geometry or dimensions.
Like all planes they extend infinitely and in Revit they can be stretching if you want them to be longer. We will discuss them heavily when we get to Family creation.

Ok so let’s follow along, Revit’s first clue is to Change Family Category.
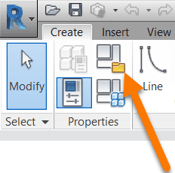 To do this we need to go to the Create ribbon, then Properties group, then click on the Family Category and Parameters button, it’s the one that has a tiny manila folder in the bottom right corner.
 This is where you can change a Family’s category.
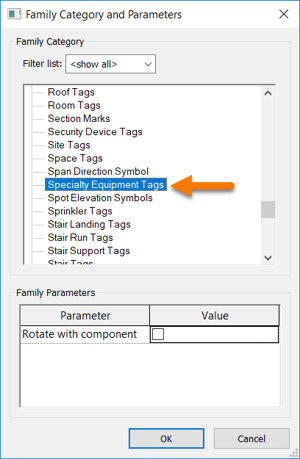
The window that opens up has a list of all the Revit categories, but with a twist, this list has Tags for all of the Categories, not the Categories themselves.
That is only because we started with a Annotation family template file.
It’s important to understand that every element in Revit falls under some Category and every Category must be Tagged with a Tag specific to that Category or you could use a Multi-Category Tag.
If you want to Tag an Electrical Fixture, you would need to use an Electrical Fixture Tag.
All foodservice equipment falls under Specialty Equipment so all we need is a Specialty Equipment Tag until we get to MEP Rough-Ins.
Scroll down and select Specialty Equipment Tags, then press OK.
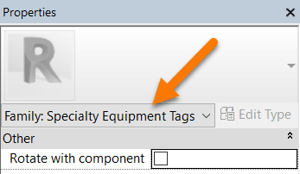
It won’t look like anything happened but you can see the change in the Properties window.
Alright so before we create our Tag, let's dissect a Tag and I will show you how each piece of the Tag is created in Revit.
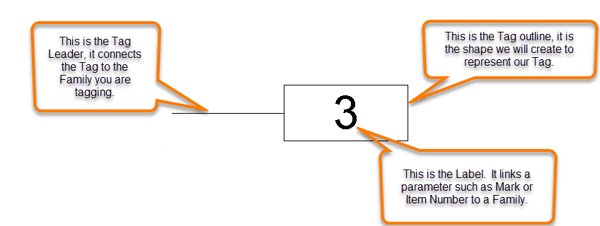
Let’s start our Tag by creating the Label first. Labels in Revit are very important, they are only used when creating Families but they have a very profound role.
They give you the ability to get a parameter value from the project into a family. Think about this for a second. Now think back to when we created our Equipment Schedule, remember for the Item Number we used the Mark parameter.
So if we want our Tag to show the Item Number of the piece of equipment we are tagging then we need to get the value of Mark from the project into this family. This is where Labels come in.
Go to the Create ribbon in the Text group and you will find the Label button. Click on it.

Revit now wants you to place the Label, the location is not important but try to keep it near the intersection, we will fix it in a second. Here is where I clicked.
Once you have the Edit Label window open, first check to make sure Specialty Equipment is shown in the grayed out Select available fields from: drop-down list, otherwise you need to go back and change the Category to Specialty Equipment with the Family Category and Parameters button (manila folder).
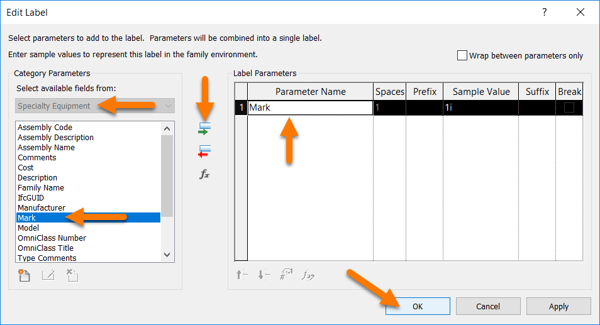
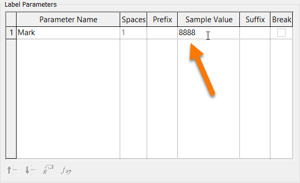
Next you want to select the Mark parameter in the list on the left and then click the green arrow button to move the Mark parameter to the Label Parameters list on the right.
 The Label is now ready.
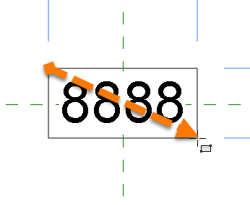
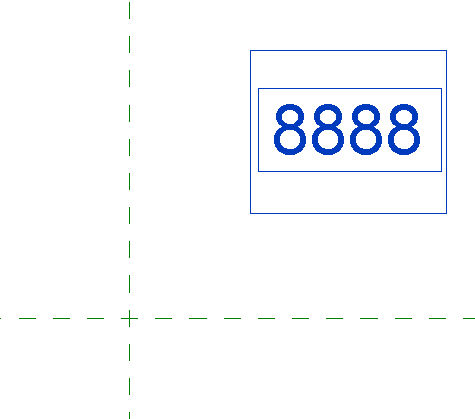
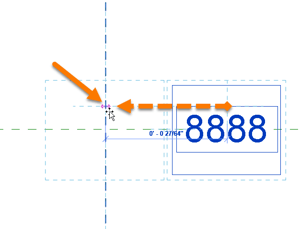
But before we go, I want my Label to work for up to (4) characters so let’s change the Sample Value to 8888, that way when I draw an outline I will know that it can cover up to (4) characters as well.
Ok now click OK.
Back in the Family Template you can now see your Label.
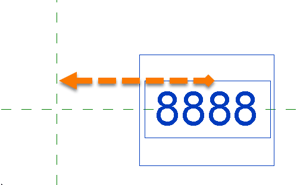
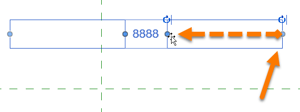 The blue dots are grips, since our Label doesn't need to be wide you can grab either of the blue dots and resize the Label extents to be closer to the text.
Next let’s drag the center of our Label to the center of the intersection. Unfortunately in Revit there is no way to snap the center of the Label to the intersection, or to anything for that matter so just do you best to place the Label as centered as you can.
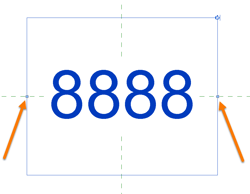 The trick is to get it as close as possible with your mouse, then zoom in, then use the mouse to drop the blue dots directly on the reference planes..
The keyboards arrows work relatively to how far you are zoomed in, so basically the more you are zoomed in, the shorter the distance that each press of a keyboard arrow moves the family. These work ok but the mouse seems best.
 Alright so now that we have our Label completed, let's draw our outline.
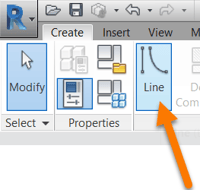
The outline is what we draw to create the tag shape. We do this by using the Line button on the Create ribbon.
Once you click the Line button you can use the same Draw tools that we used when sketching the Floor.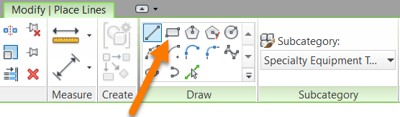
I am going to use the Rectangle tool to create a Rectangle around my Label.
 To center the Rectangle we just created on the intersection, lets first learn a new trick.
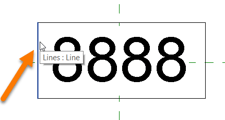
First move your mouse cursor over one of the Lines and just hover over, do not click. It should look something like this.
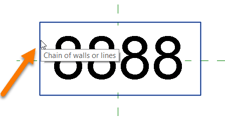 Now press Tab. The Line has changed to a Chain of lines. Tab is used in this way throughout Revit, it can be used in the project to find elements under other elements, you can grab edges or entire perimeters of floors, you can even grab chains of walls. It is an incredibly powerful tool that cycles through different elements that you can select. Once you find the element you want to select, click the mouse button.
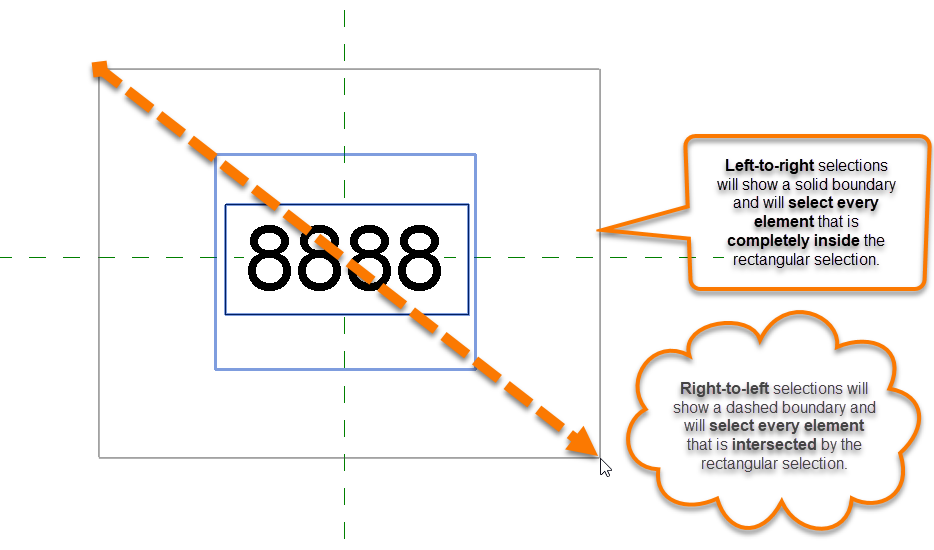 Now use your mouse to select everything in a rectangular selection box.
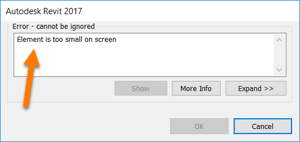 To make it easier to place this exactly where we want it, let's first place everything away from the intersection. Revit doesn't like when you try to Move elements a very short distance, it will even pop up an error message that says "Element to small on screen". When this happens, move everything farther away then try again.
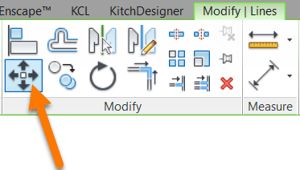 Once you have all the lines and the Label selected, click on the Move button on the Create ribbon.
The move command works by first selecting a starting point, then selecting the new location for that point.
 Click to place everything away from the intersection.
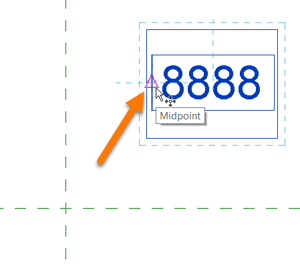
Ok great! Now select everything again, click Move again and go to the left center side of the line and when you see the magenta triangle on the Chain of lines, click it.
It will snap to the midpoint. Magenta triangles are always midpoint snaps. Magenta squares are endpoints.
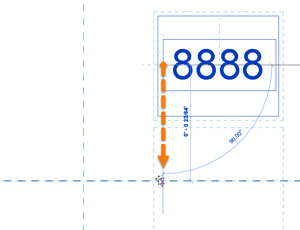
Next click on the horizontal reference plane to center our rectangle in one direction.
Looking great, now let's do the same thing to move to the vertical reference plane.
Click on the magenta triangle on the top line and move directly left to the vertical reference plane.
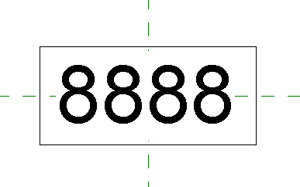
Zoom out and your Tag is now complete.
Do not draw the Leader, it is automatically drawn by Revit inside the project when you Tag. If you want to turn the Leader on or off, that is also done from inside the project.
Let’s save our Tag.
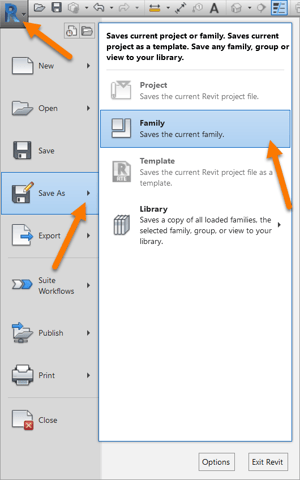
Go to the main Revit menu and under Save As click on Family.
Notice we are not saving this as a Template file, it needs to be a Family file to be used as an Annotation Tag.
Make sure you give a relevant name when you Save, like Equipment Tag.
Next let’s insert our new Tag family into our project. There are (2) buttons inside the Family editor that can achieve this, Load into Project and Load into Project and Close. Since we are done editing this Family we can use the Load into Project and Close button. This button will be one of the buttons you use the most.
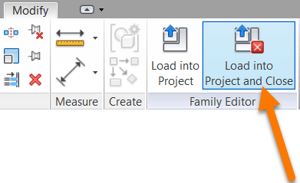 Click on the Load into Project and Close button. The Family file will close and you will be back in the Project file. It may not seem like anything happened, but what you did is Insert the Family into the Project.

Click on the Tag by Category button again and hover over the oven and Bazinga!
 You have created your first Revit Tag.
Go ahead and click the Tag to give it a number, I like the number 3.
Oops it looks like I made a mistake though, we forgot to Delete the red placeholder text.
 Alright let’s fix that, you can double-click your Tag to open up the Family Editor again.
Click on the Text to highlight it and then press Delete.
Now all we need to do is Load the Tag into the Project again.
We will use the same button as earlier, click on the Load into Project and Close button.
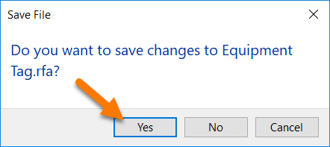 You will receive this message.
This seems like a simple enough question, we make changes to our Tag and never Saved so Revit is just asking us to re-Save our changed work.
Click Yes to Save.
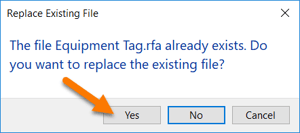 Okay now Revit wants to know if we want to replace our existing file. This is common when you are saving over an existing file.
Click Yes.
The reason I went through these steps is to teach you something very important about Revit and Family files. When you insert a Family into a Project, the Project and the Family are now linked together. By double-clicking on the Family, the Family Editor will open and you are actually working on the same Family that you inserted before.
This is important because when changes are made, if the user does not Save As to a new file name, the user will overwrite the existing Family when it is re-inserting into the Project.
There are many times when you want to overwrite the existing Family, for instance when you make a mistake like we just did. In these instances you do want to overwrite the existing Family so you don’t keep the incorrect Family.
But there are also many times when you don’t want to overwrite the existing Family, for instance when you want to modify a worktable Family to create a worktable w/ sink Family. In this instance overwriting the existing Family can cause major unintended consequences, like changing all the worktables in your project to worktables w/ sinks.
It’s this simple: When you are modifying an existing Family to create a new Family, use Save As and give the new family a new name. Then insert it into your project.
Alright so back to our Project and we have this message.
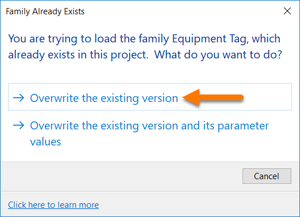 This is a common message, whenever you are re-inserting a Family with the same name you will have to make this choice.
Our Tag Family does not have parameters so this choice doesn’t actually matter, both options will do the same thing.
Click Overwrite the existing version.
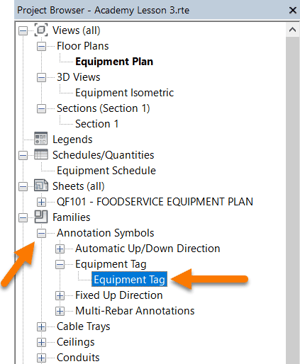 To reinforce your understanding let’s take a look at the Project Browser again.
Go to Families, then Annotations Symbols and there it is, your Equipment Tag.
The Project Browser is a great place to manage the Families in your project.
Looking good, let's finish this up by moving our Equipment Plan onto our QF101 Sheet.
 By now you can probably see that common tasks in Revit can be completed multiple different ways.
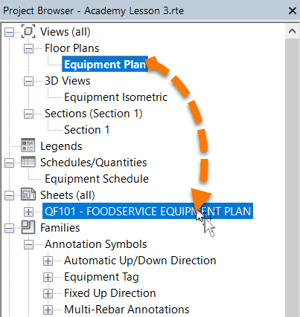
To move the Equipment Plan onto the QF101 Sheet, we can simply drag and drop it in the Project Browser.
Let's do that now, Drag the Equipment Plan onto the QF101 Sheet and Revit will then want you to place the Equipment Plan on the sheet.
If you find yourself confused on what Revit wants you to do next, check the Status Bar in the bottom left corner.
This is also very helpful when using Tab to cycle through elements.
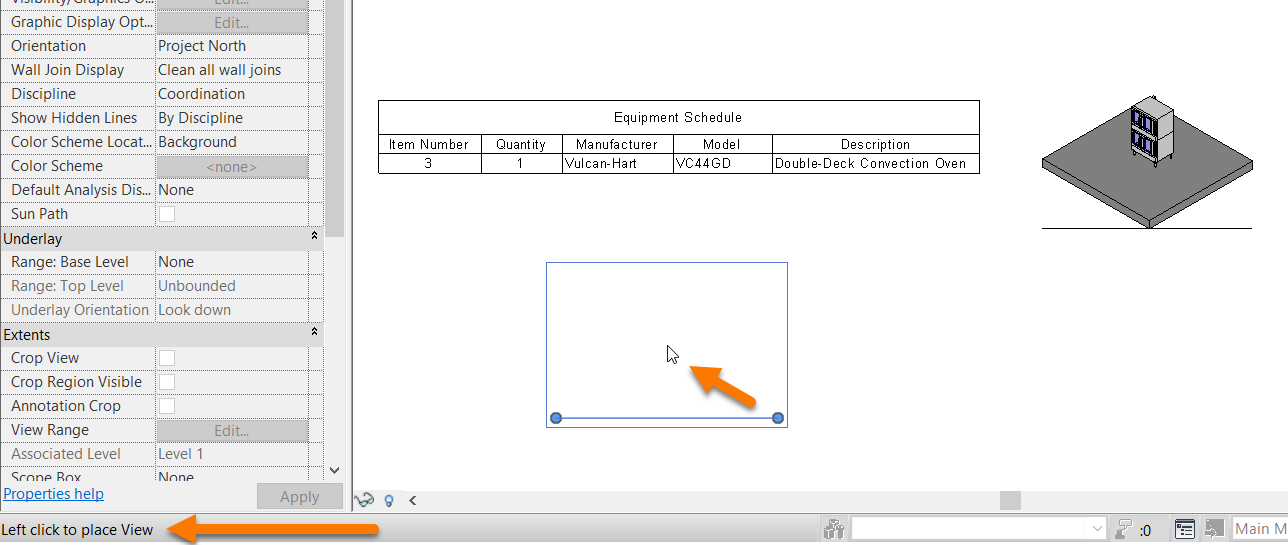
Alright so after you place your Equipment Plan and you should have something like this:
Very impressive. But what are all these lines?
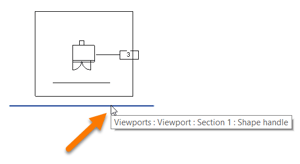 Hover over one of them and they say they are Viewports. Specifically the Section 1 Viewport.
You might think these are related to the Section View named Section 1 that we never renamed but that would be incorrect. These lines are very confusing so let’s dive into them in the next post.
Great job!
Thank you for attending the Kitchautomation Academy!
Next up- Create a View Title
Cheers!