

Click Here to Download the Tutorial 9 Revit Template to use with this tutorial 👈⏩💾.
Tutorial 9 – Create Smart Schedules
Alright this is where we start to make our template smart. Smart schedules are schedules that will support you while you are designing, kind of like a supporting cast. These schedules will be used internally to make you a better designer and to give you the ability to hide equipment in your MEP schedules.
The first schedule we are going to create is a Level Schedule.
This is a tool that you can use to quickly see the height of every level in your project.
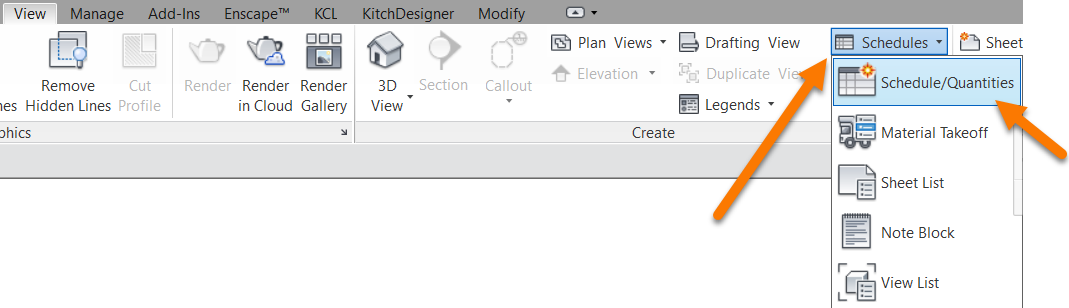
Way back when we created the Equipment Schedule I had you right-click the project browser which is still a great choice, but I will use the Schedule button on the View ribbon this time.
Why the View ribbon? To Revit everything that goes on a sheet is a view, legends, schedules, details, floor plans, elevations, 3D, to Revit those are all views, just different types of views.
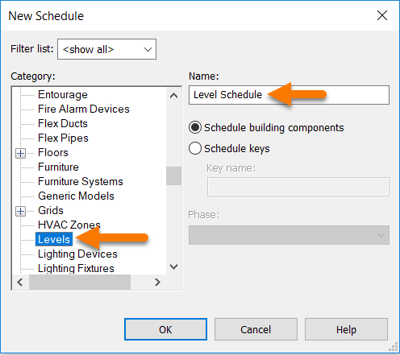 For category, select Levels.
For name, let’s change the name to Level Schedule.
Then click OK.
 Next is the Schedule Properties window, probably a window you will remember.
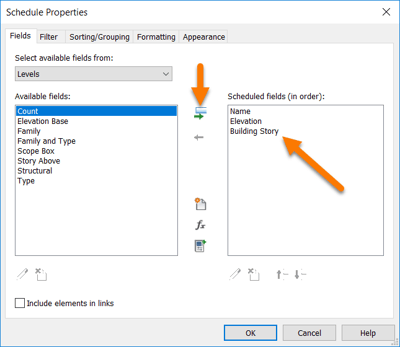
Add Name and Elevation to the Scheduled Fields.
The Name is the name of the level.
Elevation is the height of the level.
 Ok now lets go over to the Sorting/Grouping tab.
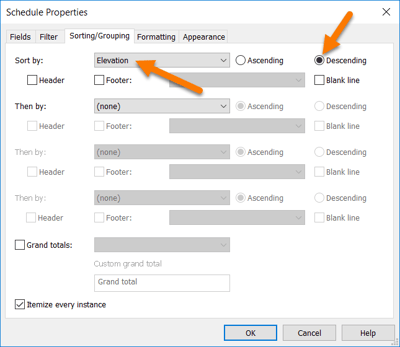
I like to sort the Level Schedule by Elevation – Descending.
I like to think of it like a building, the highest elevations or tallest levels are at the top of the schedule and the basement or lowest level would be at the bottom.
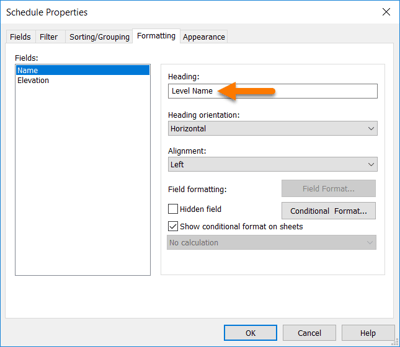 Next let’s pop over to the Formatting tab.
Here we just want to change the name of the Name column to Level Name.
A minor change but with the amount of different named elements in Revit it will help you know exactly what you are looking at.
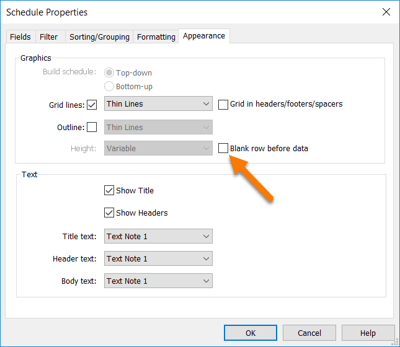 Ok now let’s go to the Appearance tab.
The only change here is to un-check the ‘Blank row before data’ checkbox.
The blank row is on by default and separates the header from the schedule, I think the schedules look much better without it, so I always turn it off.
Ok that’s it, let click OK.
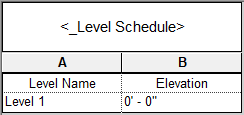 Voilà!
It’s quite simple but very effective.
When collaborating with an architect in Revit, the level elevations must be aligned between your foodservice model and the architect’s architecture model. This is one way to figure out the height of your levels and it is a great place to change the height of a level.
Ok great job let’s move on to the next supporting schedule.
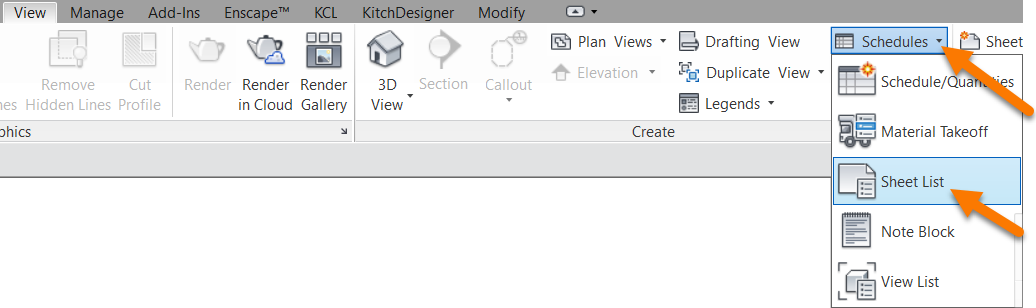
This one is called the Sheet List and is going to be very similar to the Level Schedule, you are probably even familiar with it. It will also only have 2 columns, Sheet Number and Sheet Name.
There is something a little tricky about it though, you can’t create a Sheet schedule from the same schedule button, you must use the Sheet List button instead.
 From here the process is just like creating a schedule.
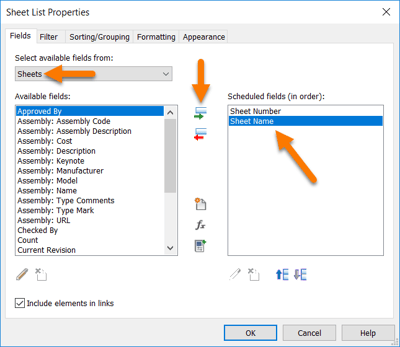
The Sheets category is pre-selected.
Select Sheet Number and move it to the right, then select Sheet Name and move it to the right also.
 Next let’s go to the Sorting/Grouping tab.
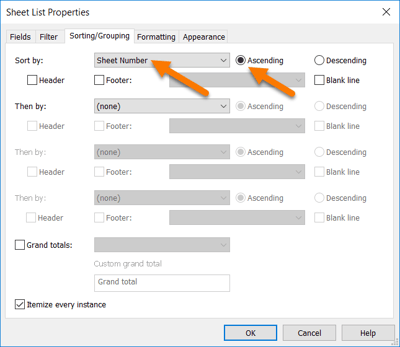
Here we want to sort by Sheet Number – Ascending.
Next let’s go to the Formatting tab.

I like to center my Sheet Number column.
To do that select the Sheet Number and then click the Alignment dropdown then select Center.
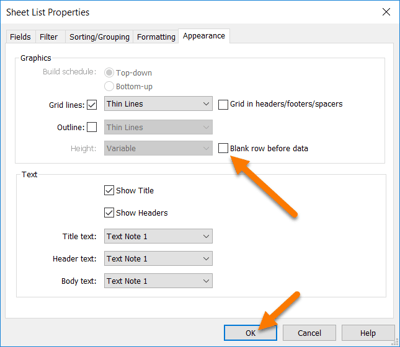 Finally let’s go to the Appearance tab.
Once again I just want to uncheck the “Blank row before data” checkbox.
Then press OK.
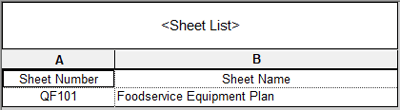
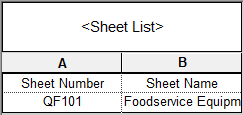 And here is what we get..
It could use some stretching though, if you hover your mouse on the right edge of the B cell your mouse cursor will change to let you stretch the cell, very similar to how it works in Microsoft Excel®.
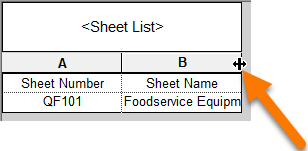
 I am going to stretch mine quite a bit more than it needs to be but we are going to have some pretty long sheet names when we get to MEP.
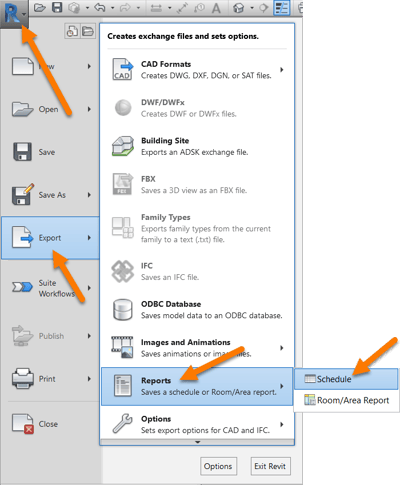 Sheet List are commonly shared when coordinating with architects or engineers. If you ever need to export the Sheet List you can export it just like you would export a schedule.
First open the schedule or sheet list you would like to export, then click to the R in the top left corner, then Export, then Reports, then Schedule.
You will need to save a .txt file, this .txt file can then be imported into a spreadsheet program like Microsoft Excel® or Google Sheets®.
Great work!
That does it for the Sheet List, on to the next.
Next up is the Submittal Schedule.
This is an expansion of the Sheet List, it will include everything in the Sheet List plus it will include submittals.
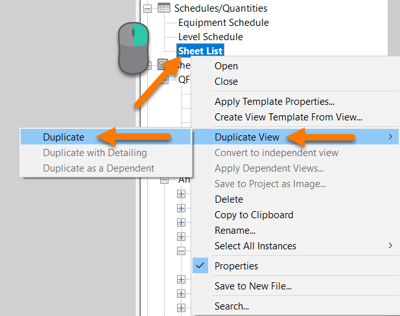 To begin we are going to take a shortcut and duplicate the Sheet List we just created.
First, right-click the Sheet List in your Project Browser, then click Duplicate View, then Duplicate.
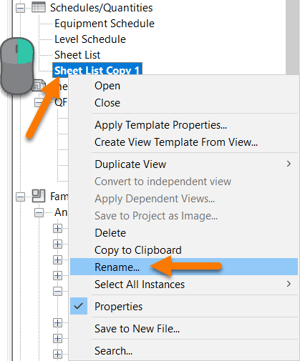 Revit will automatically add “Copy 1” to the duplicated view so let’s rename it, once again right-click the new Sheet List Copy 1 and select Rename.
Change the name to “Submittal Schedule”
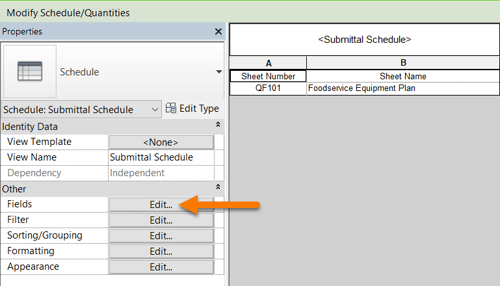
 Ok now let’s add some columns to the schedule.
Remember you can click any one of the five Other properties on the Properties Palette to return to the Sheet List Properties, when you have the Schedule open of course.
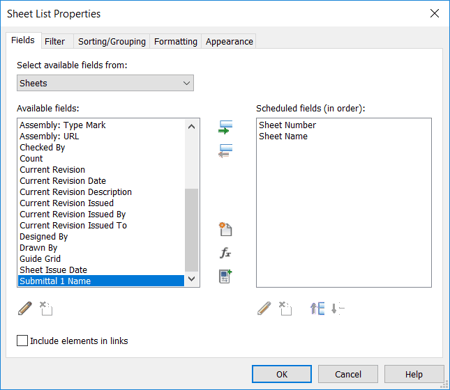 To add a column, click Fields.
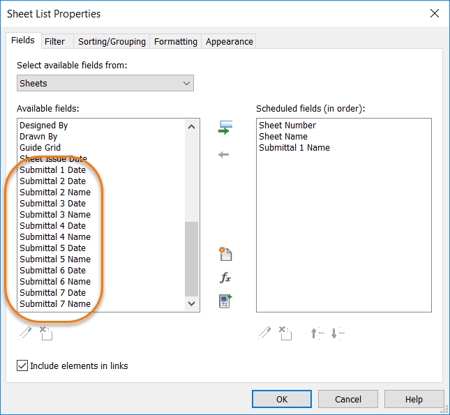
Scroll down to the bottom of the Sheet List Properties and you should see all the Submittal parameters that we created in Blog 7. Remember the Title Block Shared Parameters file we created?
Or maybe you are like me and may have forgot to finish creating the rest of the Submittal parameters and you only have the “Submittal 1 Name” parameter.
Or maybe you skipped tutorial 7 on how to create a title block and you don’t have any Submittal parameters, but no worries I will go over how to create them now. If you already have these parameters, feel free to can skip ahead.
Remember this from earlier:
“Shared Parameters cannot be added to a Project directly, you must add them by using Project Parameters. Think of Shared Parameters as Shared Parameter Definitions, they are not really parameters, they are used to create parameters.”
Let’s create some Project Parameters using our Shared Parameters file, that is how we will add Fields to our Schedules from our Shared Parameter file.
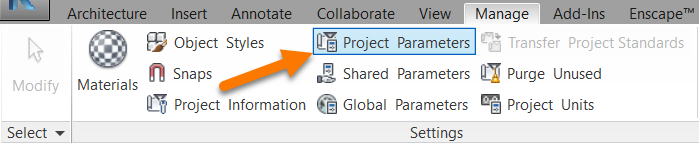
Click on the Project Parameters button on the Manage tab.
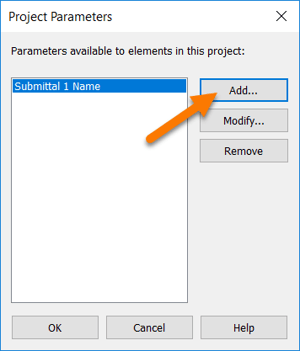
When the Project Parameters window opens you will see all the Project Parameters that you have created. This is not a list of all the parameters in the project, not even close, this is just a list of the ones you have manually added to this specific Revit project.
Click Add…
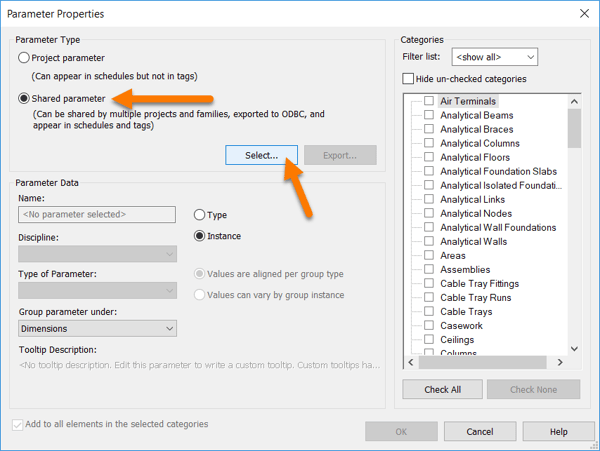
In the Parameter Properties window, choose Shared Parameter and click Select…
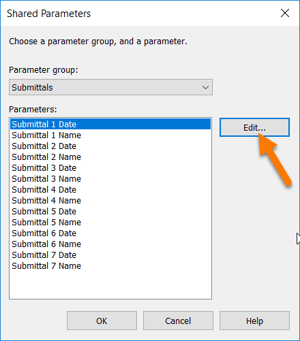
Since I already have the Title Block Shared Parameter file loaded into this Revit project, this list of Submittal parameters shows up.
If your list is empty then you need to add the Shared Parameter file to your Revit project, to do that click Edit…
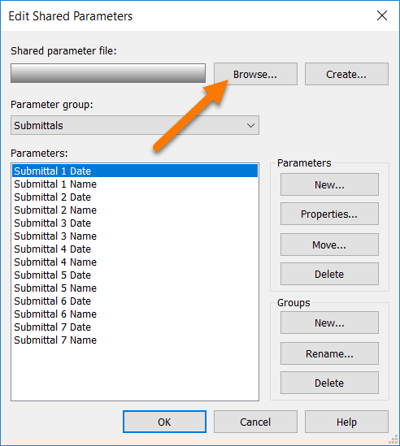 In the Edit Shared Parameters window that opens, click Browse… and find and select the Title Block Shared Parameter file that you created, or if you do not have this you can download it at the end of this tutorial.
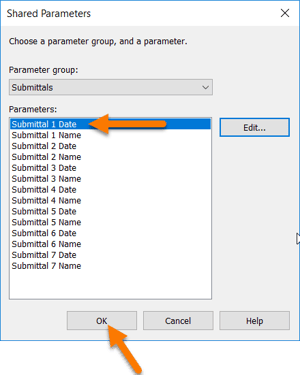
Once you link the Shared Parameter file you don’t need to do anything else, just press OK.
 Alright now everybody’s Project Parameter window should be full of Submittal parameters.
Perfect.
I am going to pick up where I left off and start by finishing Submittal 1 Date.
Select Submittal 1 Data and click OK.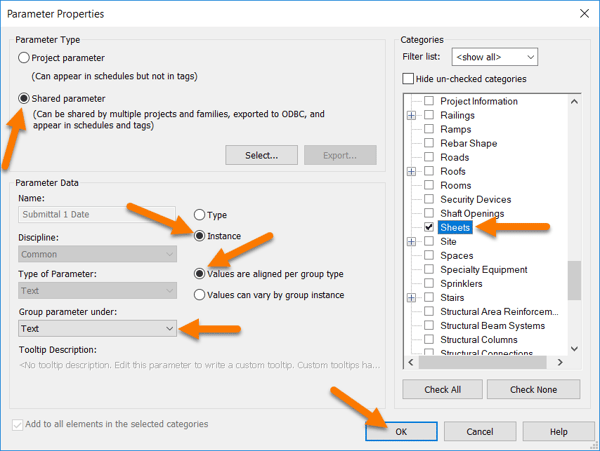
Now in the Parameter Properties window you need to select the Instance type.
Then you will be able to select the Sheet category.
Leave the default “Values are aligned per group type”, I can’t think of an instance where I ever needed to change this.
Also, you can leave the “Group parameter under:” to Text, that seems to be the best choice.
Then click OK.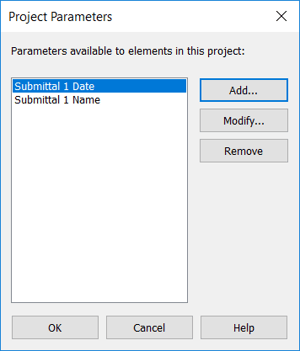
Done. Great work.
Let’s finish the rest now using the same Settings.
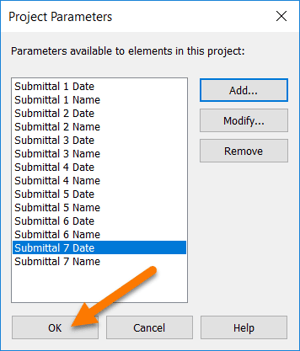
Wonderful.
Alright click OK.
To everybody that already had these parameters, you can rejoin us.
Now, let’s get back to creating that Submittal Schedule.
Open the Submittal Schedule and click Edit… next to Fields.
 And as expected, this time we have all our Submittal parameters available to use.
Let’s move them all over now, making sure to keep them in the correct order, Name before Date.
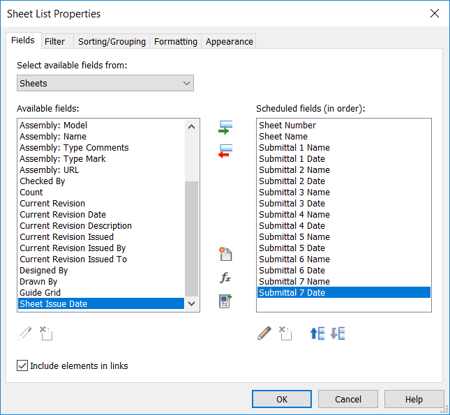
You should end up with the following Scheduled Fields in this order.
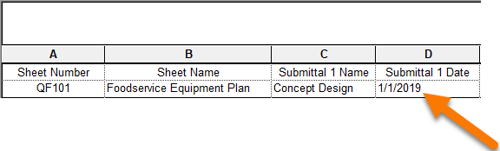
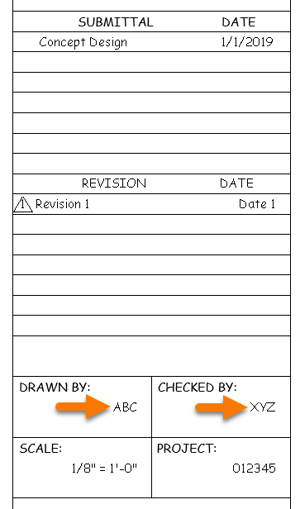
Let’s click OK to see our Submittal Schedule.

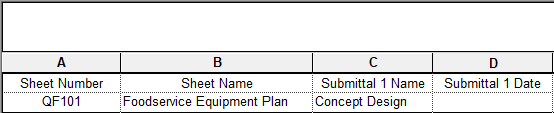
The full width version is difficult to read so I added a blow-up of the first 4 columns.
It is probably already clear how this Submittal Schedule will be used but let’s discuss it.
First let’s open our QF101 sheet.
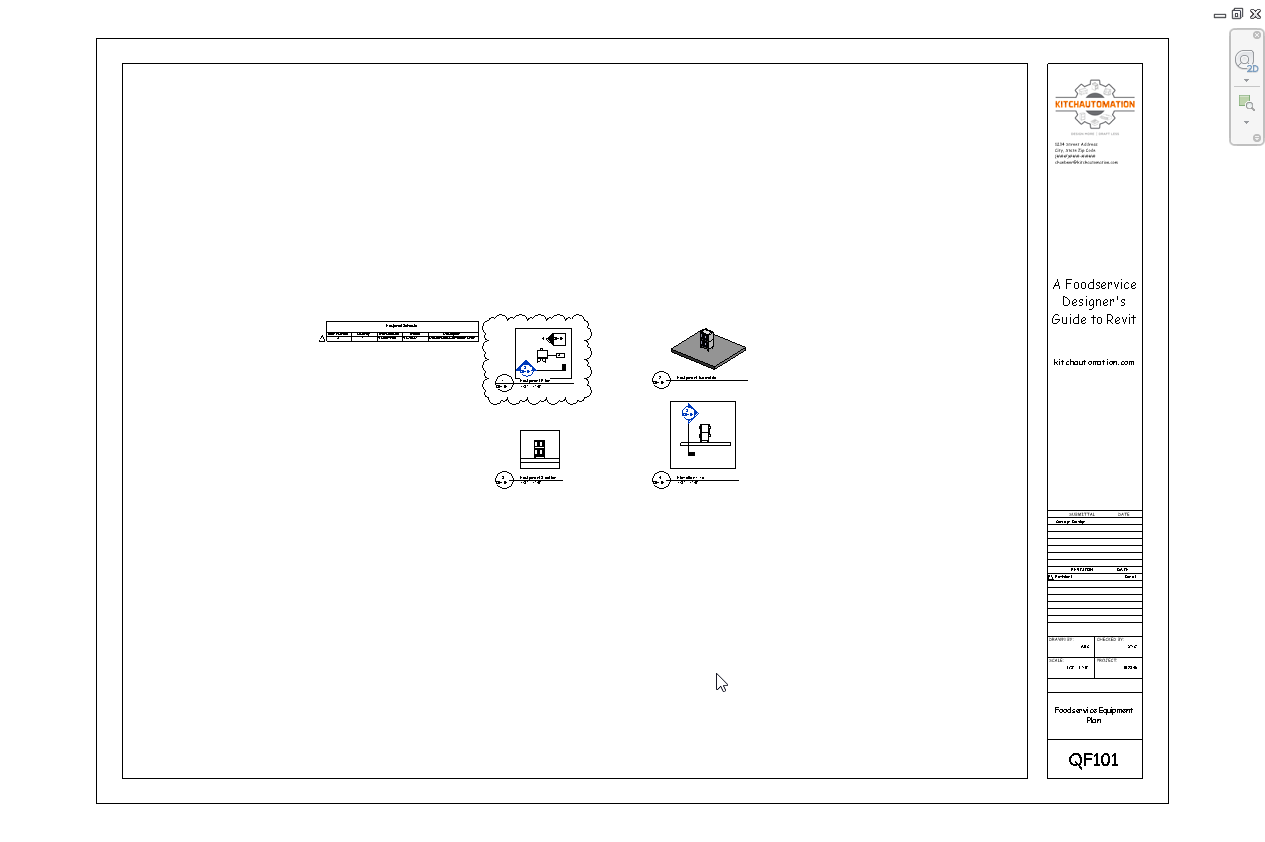
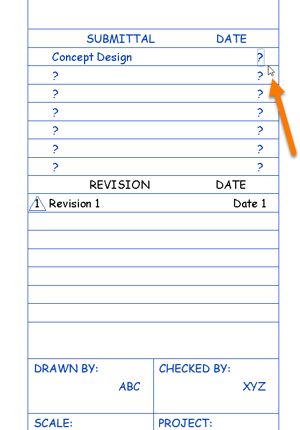
Now I want you to zoom in to the Submittal area and add a Submittal 1 Date.
 Great.
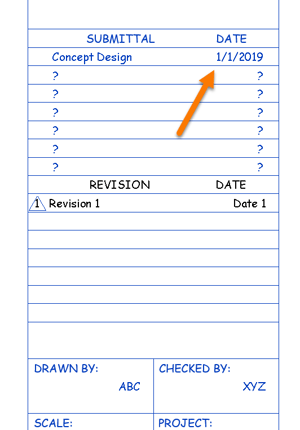
Now let’s close our Sheet view and go back to our Submittal Schedule.
 And just as you probably expected, our Submittal Schedule shows the Date we just added.
Super!
You could also change the Submittal Name from the Submittal Schedule or change the Date from the Submittal Schedule.
This Schedule can now be used to add/edit/change/remove any of your Submittal Names or Submittal Dates.
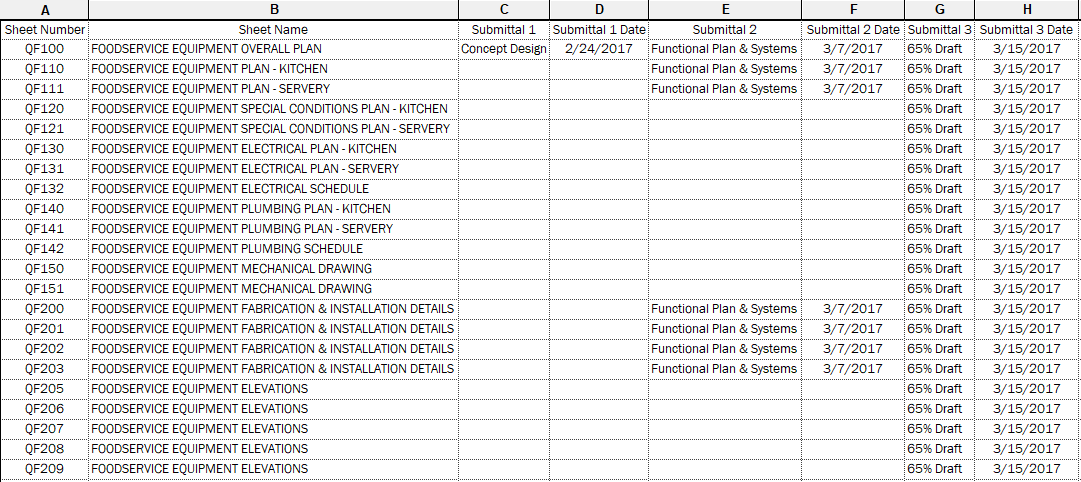
Pretty nifty right? Here is a partial submittal schedule displaying 22 sheets and 3 submittals. As you can see, the Submittal Schedule allows you to quickly check all your sheet title blocks without any sheets.
 There is one thing I forgot, we also need to add the Drawn By and Checked By columns to our Submittal Schedule.
You may be thinking, what about the Scale? Nothing to worry about here, Revit automatically detects the Scale of every view on your sheet and if they don’t match, Revit will say “As indicated”.
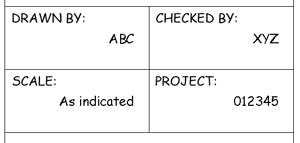
If you are wondering about Project Number, like Project Name and Project Address, that is determined by the Project Number parameter in Project Information on the Manage tab.
Those parameters are the same for every sheet.
Finally, if you are wondering about Revisions, unfortunately we are not able to add that data to our schedule. Instead you will need to go to the Revisions button on the View tab to view all your Revision data.
Revisions are tricky in Revit, so some designers don’t use the Revision Schedule in their title block and instead just create their own Revision Name and Revision Date parameter just like how we created our Submittal parameters or just use the same Submittal parameters for both Submittals and Revisions.
Alright let’s add the Drawn By and Checked By fields to our schedule.
Click Edit… next to the Fields parameter to open the Submittal Schedule.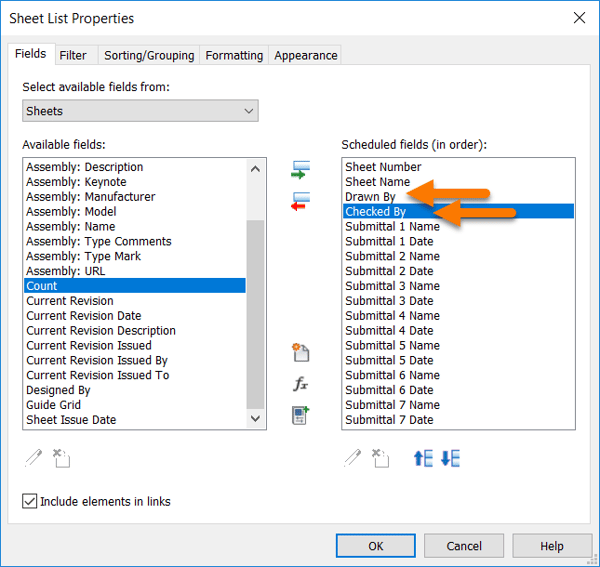
Drawn By and Checked By and OOTB Revit parameters so all we need to do is move them to the right.
I also like to move them to the left of the Submittal 1 column, this way they are always visible, otherwise they seem to get overlooked when they are to the right of column Submittal 7.
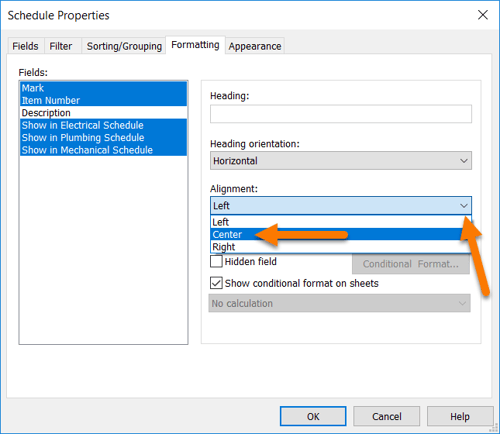
Ok now let’s jump over to the Formatting tab.
Let’s center the Alignment for the Drawn By, Checked By and Submittal Date columns.
Hold CTRL and we can select all of them, then change the Alignment to Center.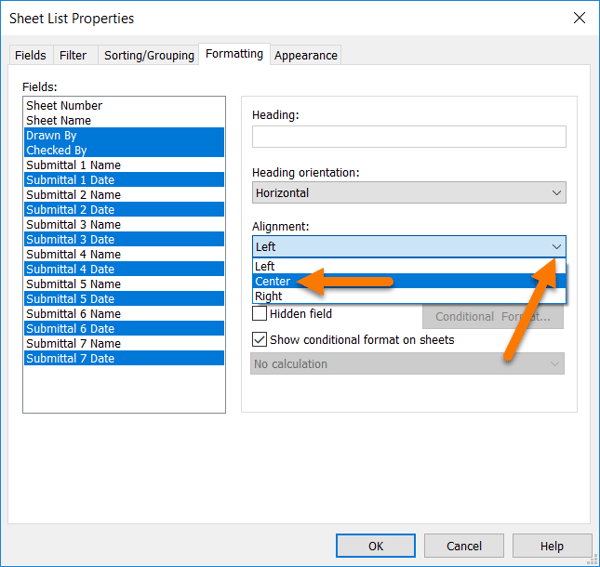
Click OK and check out your new Submittal Schedule.

Wonderful!
Only one more to go, keep it up!
Next up, the schedule of all schedules, literally 😉. It along with many of the other template tricks in this guide were implemented in our Revit template by my former partner, @kitchenbuey. He was a pioneer when it came to foodservice design in Revit and this schedule was just one part of his genius.
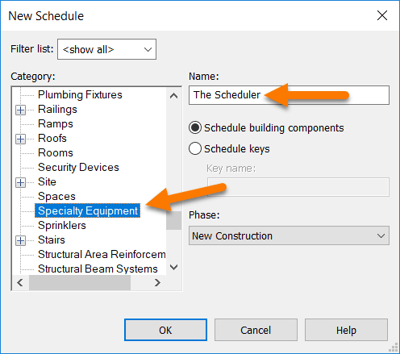
Since this is a schedule of schedules, naming it is a challenge. I am going to call it The Scheduler based on how it is used.
This schedule will allows you to control the visibility of your equipment in the Electrical Schedule, Plumbing Schedule and Mechanical Schedule. We haven’t created those schedules yet, or anything MEP related but this is the perfect time to start down the MEP path.
Also the next Tutorial will be on creating MEP schedules.
Let’s get started.
First step, right-click Schedules/Quantities in the Project Browser and click New Schedule.
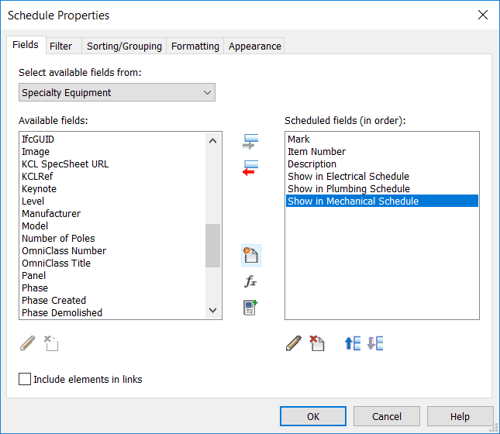
Select the Specialty Equipment category and change the name.
Then press OK.
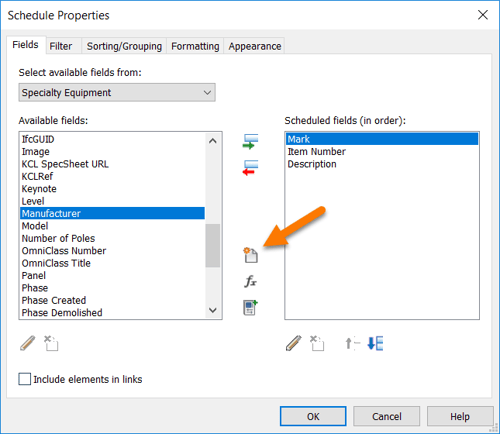 Back to the Schedule Properties window.
We can start by moving the Mark (or Item Number) and the Description to the right side.
Next, we need to create some new Project Parameters, to do this click on the New Parameter button.
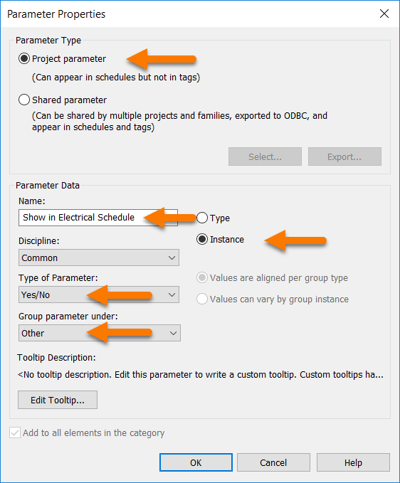 In the Parameter Properties window select Project Parameter.
Change the name to “Show in Electrical Schedule”
It will be an Instance parameter.
Change the Type of Parameter to Yes/No, this is very important and will result in the parameter having a checkbox that we can check and uncheck.
Finally you can leave the Group parameter under: at Other.
Then press OK.
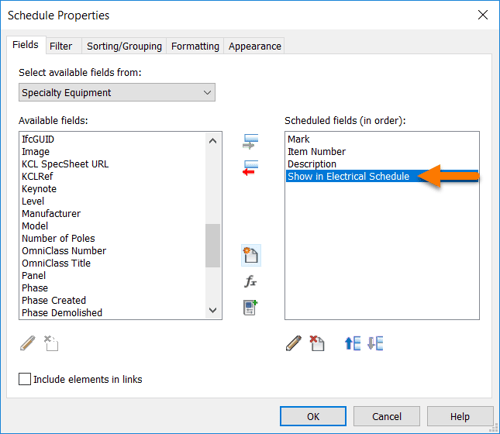 Perfect.
Now let’s create identical parameters with different names for the “Show in Plumbing Schedule” and “Show in Mechanical Schedule” parameters.
Looks great.
Let’s peek at our schedule and see what it looks like.
Click OK.

 Looks ok after stretching the columns to fit the headers but I think we can do better.
Let’s go make our usual changes; remove the blank line after the header row and center the parameters.
First up, centering the parameters.
Hold CTRL and change the Alignment to Center.
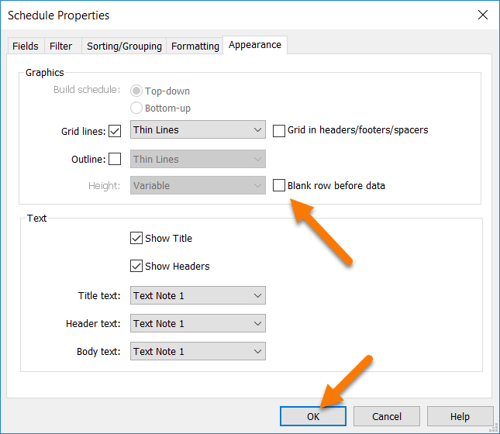 Next head to the Appearance tab to remove that blank line.
Wonderful, now let’s go check it out.
Click OK.

Looks great!
You should only have Mark or Item Number though, whichever you decided to use in your Equipment Schedule.
So how does this work?
Whenever an equipment family is added to your project, it will appear in this schedule and all the checkboxes will be checked and grayed out. We don’t actually have an Electrical Schedule yet so we can’t see how our convection oven appears in that, but we are going to create it and the other MEP schedules now.
If you want to remove an equipment family from appearing in your Electrical Schedule, regardless of the parameters or the parameter values, all you need to do is uncheck the “Show in Electrical Schedule” field for the equipment you want to hide. Same for the Plumbing Schedule and the Mechanical Schedule, or you could even add another schedule.
It is possible to encounter a family that has unnecessary parameters and then you run into the issue of the family showing up in MEP schedules that it has no business showing up in. Trash cans in the electrical schedule, for example.
Deleting parameters from families is not a quick task although there are many third party add-ins that will help it go faster.
You can fix those parameters when you have the time and when you need to get your plans finished and to the printer you can use The Scheduler and it will be your best friend.
Alright well that is it for the Smart Schedules, I hope you enjoyed making them and I hope you enjoy using them even more. Everything in Revit is data so start thinking of creative ways to use schedules to make your process smoother or give you a better insight into your project.
Onward to MEP!
Thank you for attending the Kitchautomation Academy!
Next up- Create MEP Schedules
Cheers!