

Click Here to Download the Tutorial 2 Revit Template to use with this tutorial👈⏩💾.
Tutorial 2 - Create a Floor and a 3D View
Last tutorial we created our Equipment Schedule and placed it on a blank sheet to see what it would look like. In this blog we will create a Floor and then a 3D View and place it on our blank sheet with our Equipment Schedule. Let’s start with a bit of housekeeping.
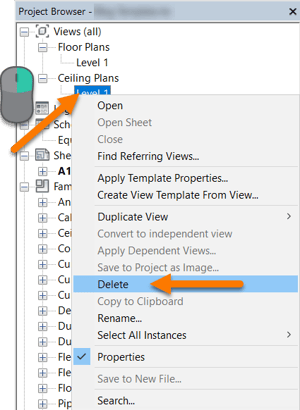
First let’s remove the Structural Plan and the Ceiling Plan from our template. These will not be used. The quickest way to remove them is to right click the view in the Project Browser and select Delete. You can also highlight the View and just press the Delete key on your keyboard.
Let's also rename our sheet from A101 to QF101 and change the name of the sheet from Unnamed to FOODSERVICE EQUIPMENT PLAN.
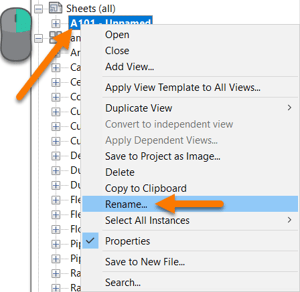
To do this you can right click on the sheet in the Project Browser and select Rename.
Why QF101?
United States National CAD Standards Drawing Set Organization
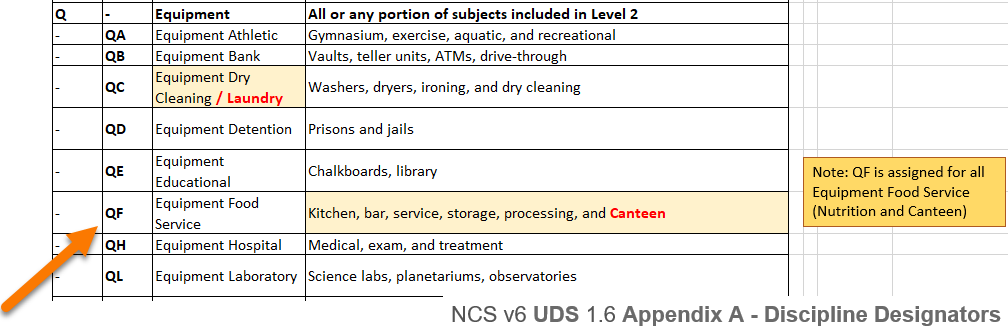
 QF comes from the United States National CAD Standard which is created in conjunction with the American Institute of Architects (AIA). It is sometimes referred to as the AIA standard because the AIA CAD Layer Guidelines are included in the NCS.
QF is the Discipline Designator for Foodservice Equipment.
Q is for equipment
F is for foodservice.
1-- also comes from the NCS. Floor plans start with 1.
01 is the first sheet in the sequence, 00 is not permitted so it always starts at 01.
Here is the full link to the NCS website. United States National CAD Standards
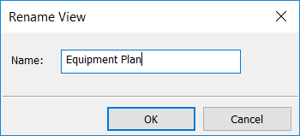 Let's also rename the Floor Plan view named Level 1 to something more suitable, let's go with Equipment Plan. Again I used the Project Browser and right-clicked the view and selected Rename.
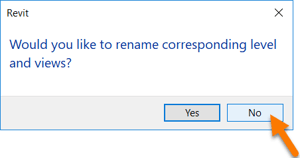 When you Press OK, you get this message, “Would you like to rename the corresponding level and views?”
Select No.
But what does that mean? So far I have explained that all Views are shown in the Project Browser, but Levels are not in the Project Browser. So where are Levels?
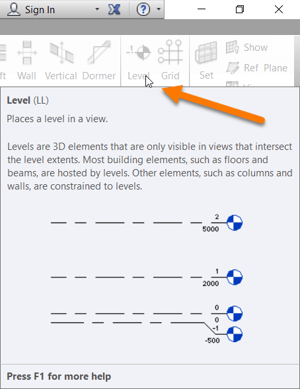 There is a button on the right side of the Architecture ribbon called Level. The tool tip says it “Places a level in a view.”, but it doesn’t work if you try to use it in a floor plan view like our Equipment Plan.
If you let your mouse cursor sit over the button for a few seconds you will get the extended tooltip with another clue, “Levels are 3D elements that are only visible in views that intersect the level extents.”
Only visible in views that intersect the level extents? Hmm.
Well if we are looking for intersecting views, we first must understand what a Level is and Revit fails to educate us.
A level is a horizontal plane that extends infinitely outward.
To be intersecting view, the view would have to be vertical. Floor plans and ceiling plans are horizontal planes so Levels do not show up in them. Levels also do not show up in 3D Views since they do not have physical geometry associated with them whereas Floors do show up in 3D.
Ok so now that we know we need a vertical plane, let's create a view with a vertical plane so we can finally see a Level. There are two different types of views that fit the bill, Elevation Views and Section Views. Either view will show Levels but let’s start with the Section View.
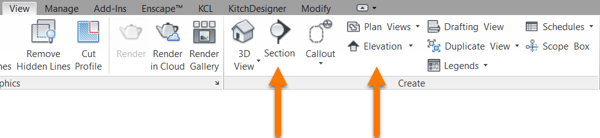
Make sure you have your floor plan view open and then click the Section button.
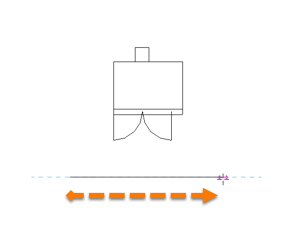
To create the Section drag the cursor with the line in front of the equipment from left to right like so.
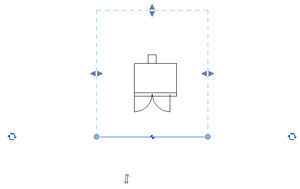
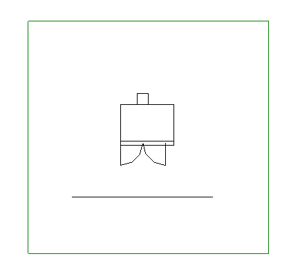
The Section view will look the image to the right once it is created.
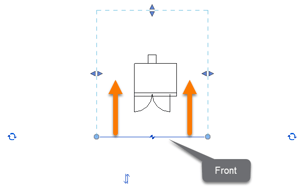 The dashed box is the extents of the view. The solid line is the front where the view starts. Everything inside of the box will be visible in the view unless it is hidden behind another element.

To open the Section view, double-click the solid line or right-click the solid line and select Go To View.
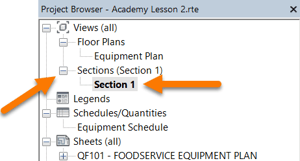 You will also see the new Section 1 view that was created in the Project Browser, expand the Sections section if you need to.
Double-click on the Section 1 view to open it, let's do that now.
This is what you should see. Hover over the line and we can finally see our Level. The default Level is named Level 1.
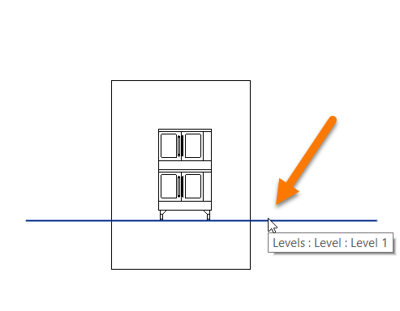
Levels do not have a boundary, then go on infinitely in all directions. Levels do have an elevation, or height. This elevation can be the default like Level 1 being at 0’-0” or it can be based on Sea Level or i could just be an arbitrary number.
In practice they are set by the base building architects and as consultants we must match our Levels to the Architect's Levels.
Levels should not be confused with Floors. Floors are an architectural element that have a boundary. Similar to Levels they also have an elevation.
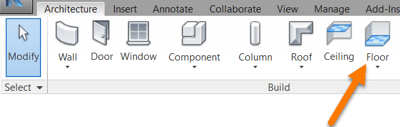
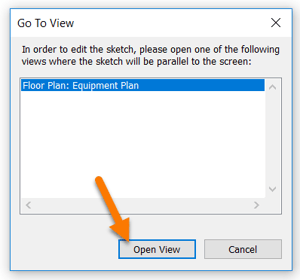 Ok now that we understand the basics of Levels, let's create a Floor. Stay in your Section 1 view and go to the Architecture ribbon and click the Floor button. You should receive this popup message if you started in your Section 1 view.
Like our issue from earlier, Revit is telling us that we cannot create a Floor in a view that is not parallel to the sketch, our sketch is a floor which means Revit wants a horizontal plane.
Let’s follow Revit’s lead and select Floor Plan: Equipment Plan and then click Open View.
This greenish-blue ribbon color is a sign that you are in a Create Mode. When you are in this mode you cannot do anything else but sketch the floor. You can’t even press ESC to go back, to exit you must press the Red X. Kind of frustrating but these Create Modes are common in Revit so get used to them and remember the Red X will always get you out of them. Sometimes the Modify|Create Floor Boundary ribbon loses focus and pressing ESC still doesn’t work so you must manually click on the Modify ribbon tab to get back to the Red X.
The Draw panel has all kinds of great tools to use to draw your floor. You can draw it one line at a time or by using one of the shape tools. I recommend you hover over each tool to learn what they do. The Create Mode is a very nice feature of Revit that acts like a isolated draw area. You sketch using any of the Draw tools shown above and then you can use the Modify tools like Trim to get your sketch perfect and once your sketch is ready, you press the Green Check to finish.
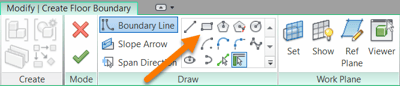
Let’s try it out, for our floor we will use the Rectangle Draw tool, first click on it to toggle it on.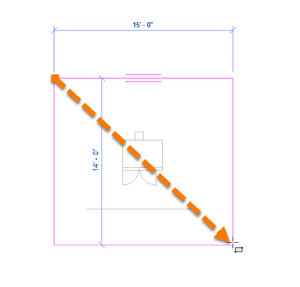 Now click and drag the cursor in the floor plan view to draw your rectangle. Place the oven inside your sketch to have it sit on your floor.
The magenta lines are your sketch lines and, in this context, indicate the extents of our Floor. Revit uses this magenta color for sketch lines in all of the Create Modes so you will see them again.
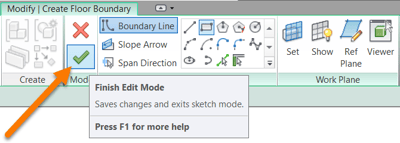
Clicking the Green Check to finish.
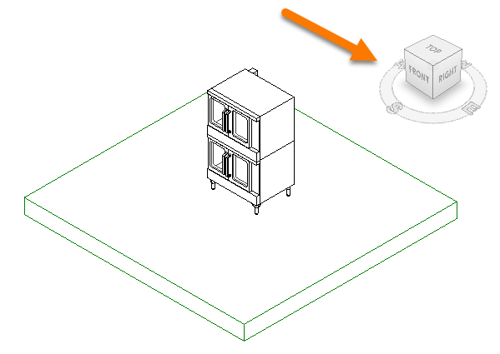
We now have a floor underneath our piece of equipment. The green rectangle shows the boundary of our floor. Green is the Revit default color for Floors but we will change that color in Object Styles in a few steps.
Right now let’s open up our 3D View to see how our oven looks on top of our new floor.
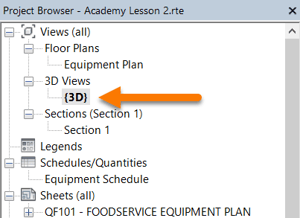
By now you know that you can open the 3D View from the Project Browser by double-clicking or right-clicking.
 Since our 3D view happens to be the Default 3D view, which I can tell by the curly brackets, we are able to open it by clicking on the House icon in the Revit Quick Access Toolbar.
This little House button is one of my favorites, I use it all the time and I think you should too. Arguably the best feature in Revit is its ability to move between 2D and 3D with ease. Once you get comfortable using the SHIFT + Mouse Wheel Button combo to rotate around in the 3D view, you will use the 3D views as part of your workflow. They are also an amazing design tool to verify your work and visualize your designs.
Use the 3D views early and often and you can always click on the House button to open the Default 3D view or if you rename the Default 3D View then the House button will create a new Default 3D view.
Ok let’s click on the House button now to open the 3D view.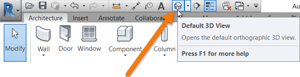
In the upper right hand corner you will see the View Cube. This handy little tool is used to jump around to preset views.
 Hover over the corners and edges and you can see all the view angles, click them to see how they work. Also pay attention to what the View Cube says, Front, Left, Back, Right, Top, and Bottom are the six sides. Those will help you orientate yourself when in 3D views.
You can then use the SHIFT + Mouse Button Click to rotate the view to the perfect angle. Give that a try now.
Ok now let me show you how to make this look more realistic. Right now the floor doesn’t even look like a floor. The oven is nice but it could have more detail, look closely and it doesn’t even show the knobs or controls, hardly a real representation of the oven. Let’s see what we can do about that.
 Take a look at the bottom left corner and you will see some view settings.
Click the Detail Level button and change it to Fine.
Look back at our oven and we now have some knobs and controls.
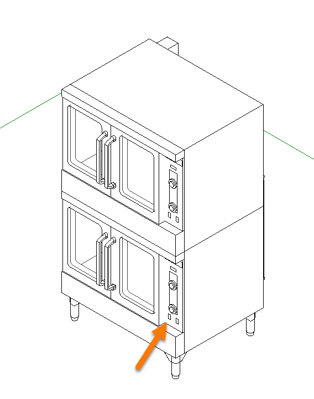
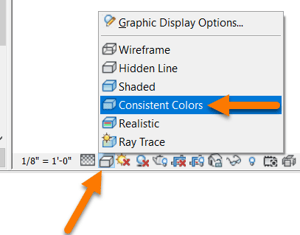 Looking good but let’s take it a step further. The button next to the Detail Level is the Visual Style, click this to change from Hidden Line to Consistent Colors.
For your understanding, the Graphics buttons at the bottom left corner of the view are just shortcuts to the Graphics properties in the Properties window.
The Detail Level can be changed directly from the Properties window.

 The Visual Style must be changed from inside the Graphic Display Options which can be accessed from the Properties Window.
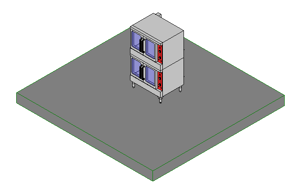
This time the results are dramatic. We now have a color version of our oven, our controls have a red panel just like in real life, our knobs are black, the glass is see-through. The floor even resembles quarry tile a bit, well that might be a stretch.
Overall it looks great but those green edges are really an eye sore so let’s fix that.
We will go into the Object Styles and I can show you how to change these default green Floor edges, most people aren’t printing in color so it doesn’t really matter but it will be a good lesson on Object Styles and I’m sure these green edges won’t be missed.
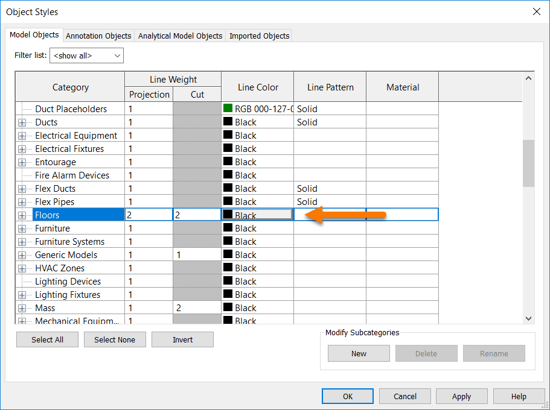
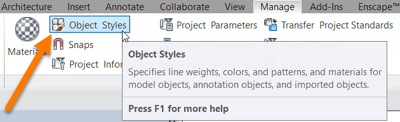 Go to the Manage tab and click on the Object Styles button. Scroll down to Floors. Click the Line Color button for Floors and you can change the color. I will go with Black.
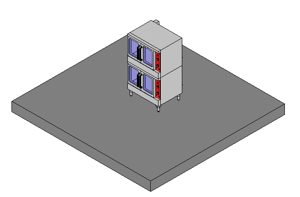
Now click OK to return to our 3D view. Looks great!
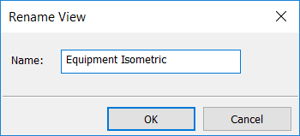 Let's finish by giving our 3D view a name, Equipment Isometric.
Finally, let's place it on our QF101 Sheet right next to our Equipment Schedule to set us up for the next tutorial.
Great work everybody!

Thank you for attending the Kitchautomation Academy!
Next up- Create an Equipment Plan with an Equipment Tag
Cheers!